Last week I ordered a MintyBoost charging kit from AdaFruit. The MintyBoost is a circuit that takes power from a pair of AA batteries and outputs 5v through a USB port, so you can charge your phone or other similar device where you might not have access to another power source. It gets its name because it’s commonly built into an Altoids mint tin, but I wanted something a little heavier duty than candy and tiny batteries.
I was reminiscing with friends about the days of mix tapes when it struck me that the ubiquitous USB flash drive would fit almost perfectly into a cassette tape, making a perfect marriage of old and new media. You could have all of the artwork and label design potential of the tape (to say nothing of the nostalgia), but with the space for more than just a dozen songs.
A quick survey online found some instructions on making your own or even buying pre-made ones. Ignoring all, I plunged ahead. After all, this is about learning, building, and probably screwing up, not just having a finished product.
I found a cheap, unopened cassette tape at a local surplus store, but it turned out to not have the screw-joined halves I thought it would. I was going to have to raid my old stash of tapes from the corner of the basement. I haven’t listened to a tape in at least a decade, don’t even have a tape player, and certainly don’t still have the old Yamaha multitrack recorder these were recorded with, but I still had a tough time sacrificing it. Why, there could be a heartfelt masterpiece on that tape that 22-year-old me recorded. Someday the archivists (or prison psychologists) will want to study it!
Oh well. Â Onward! Â I at least chose one without a label, on the theory that if I hadn’t thought it worthy of labeling back then, it couldn’t be that important. Now we’ll never know.
With tape in hand, I needed a flash drive. I had a few laying around, so after disassembling the tape to see just how much room there was inside, I spent an hour or so trying out different drives for fit. I wanted the tape to retain its original profile, but I wasn’t sure whether the USB drive should slide out, swivel on this axis or another, or just present a port that would require a separate cable. The drive that seemed most promising was a 2GB SanDisk Cruzer and its sliding action; it would require the least modification to the tape and would be the strongest.
The donor drive, in and out of its original housing.
On a side note, I’m amazed by the fact that I live in a world where it’s hard to find a cassette tape, but I’ve got multiple gigabyte+ storage options buried in my junk drawer. Â I remember when these cassette tapes used to be the storage for my computer. Three cheers for progress!
With a 3/16″ end mill I milled the port for the USB connector to slide in and out of. Then, after measuring and re-measuring more times than I can count and mapping out the exact numbers of turns and even which direction to turn the handles on the mini-mill (I’ve only had it for a month, and this was my first project after getting it set up), I plunged the mill into the tape and started cutting the opening for the sliding mechanism. I put the opening on side B of the tape, so that side A would look stock while it was in the case. All the planning worked out well, because when I popped the tape out of the vise, the drive fit perfectly.
Unfortunately, the two halves of the cassette didn’t quite fit together. If the SanDisk folks had made their drive just the smallest fraction of an inch thinner, it would have slid right in for a perfect fit. I was going to have to thin the cassette shell.
The finish is a little rough, but it works. You can see the opening for the slider, the thinning of the case, and the notch that keeps the drive locked into place when it’s all the way out. With side B milled out, I tried to put the two halves of the cassette shell together again. No luck, and side B couldn’t stand to lose any more plastic, so I did the same thinning on side A.
A test fit found everything sliding easily when it was supposed to and locking down when required, so I moved on to the reels next.
As you can see in the photo, the take-up reel got in the way of the memory. I attacked it with the belt sander and ground it down just barely to the inside sprockets, then glued it into place (below). It would have been nice to retain the tape functionality, but it wasn’t to be.
The spool of tape on the other reel was a little bit too large and kept the memory assembly from being able to slide all the way back. I didn’t want to unspool too much and lose the full-tape look, so I experimented with the spare tape I got from the surplus store and put some superglue across half of the reel. The thin glue quickly soaked in and glued the layers of tape solid enough that I was able to cut it right through with an X-Acto knife without it unspooling. The cut was a little rough, but that could be cleaned up. More detrimental was that it would be obvious from looking at the little crusts of dried glue through the tape’s window that it wasn’t quite right. Maybe something useful can be done with this tape-solidifying knowledge later.
So after that I decided it might not be so bad after all to lose the 1/4 inch of tape needed for clearance. Finally, a part of the project my four-year-old could help with: “Take this end and pull until I say stop!”
When our fun was over with, I threaded the tape back around the rollers and through the guides.
I know there are some problems with the tape path in this picture. I realized and corrected after the photo.
At last, I put the two halves in place and screwed them together. I didn’t have any labels for the tape, so I trimmed down an address label and used that, then plugged it in to the computer and reformatted to use the name “Mix Tape” (what else could it be?).
The drive works well on my laptop and in the USB port on my desktop machine’s keyboard, but because of the weight and leverage, I don’t know how it would hold up being unsupported in a port higher up on a desktop machine.
If I’d labeled it when I was 16 it probably would have had more stars, spirals, and other doodles on it than today’s version.
Side A looks just like a standard tape, so much so that if it’s still in the case you’ll only notice the USB on the side if you look closely. I’ve handed it to a couple of friends, saying “I’ve got some music I want to share,” only to have them laugh and complain they had nothing to play it on. They have to be told to take it out and flip it over.
And now I have to go make some for them. That’s the trouble with making cool stuff.
Can you not hit the broad side of a starship with a snowball?  Have you ever said “These aren’t the snowmen we’re looking for.”? If so, then this cozy Stormtrooper neckwarmer is just the thing to keep you warm while you’re hunting down enemies of the Empire on a crisp winter night.  Read on for instructions on making your own.
With the core memory fabric finally in hand after the design process, what could I make? My first idea was a necktie, but having to cut that on the bias wasted a lot of fabric and the pattern ended up going the wrong way. My wife suggested a headband would look good, so I poked at a few of hers to puzzle out the construction, then got out the scissors.
After my visit in May to the Computer History Museum in Mountain View, California, I was fascinated by the lattice structure of ferrite core memory. I thought it would make a great fabric pattern that was abstract enough to appeal to regular folk, but had a higher level of techno-geek meaning to it.
Read on for the story of how I went from the rough concept sketch above to a finished design printed by Spoonflower, an online service offering on-demand fabric printing.
My son—now four, but three when I conceived this project—loves numbers and counting. More than a few times I’ve peeked in at night to find him asleep with a calculator in one hand and a flashlight in the other. And one of his favorite things to do with the calculator is incrementing “1 + = = = = = = = = = =” until he can’t keep his eyes open any more. I decided to build him a dedicated machine that would do nothing but count up and count down.
My initial concept was simple: a seven segment LED display so it could be read in the dark, Â a rotary switch in the middle to choose the value to operate with, and big buttons for adding and subtracting. Â Green makes the number get larger and red makes the number get smaller.
Below is the finished product. Click the “Continue Reading” link under the picture for details about the process of building and programming. I didn’t take a lot of photos through the build process because there wasn’t much to see, so I’ll illustrate relevant parts of the writeup with photos of the finished counting box. Also, please be aware that this is meant more as a documentation of my build process and the things I learned, rather than as a step-by-step how-to guide to make your own. I hope you’re still able to learn something or be inspired.
The C1 piece, a .02μF capacitor, broke off at one of the legs. This is understandable, since the capacitor sticks out to be bent and squished accidentally by clumsy fingers.
If you look closely, you can see the broken right leg.
You can order replacement parts, but the shipping cost was prohibitive. Time to crack the case and peek inside! A fingernail and a small flat screwdriver (the size you might use to tighten screws on your glasses) popped the part open at the tabs without too much trouble, but be careful because if you crack the plastic that’s going to be a lot harder to repair than a wire inside.
Looks simple enough.
The local Radio Shack didn’t have any .02μF capacitors, but they did have .022μF. We had circuits to build right away, and it should be close enough for everything in the kit. If I feel like getting it exactly right later I’ll add a .02μF to the parts order for my next project.
Close enough.
The leads desolder easily, but be sure you don’t keep the heat on too long or you might melt the plastic directly underneath. Put the new part in through the holes in the case, bend the leads, then trim them to fit the tabs. The tabs don’t have any holes for the leads to go through, so just hold the lead onto the existing solder and heat it up. When it was done, the bottom half of the case clipped right on and we were back in business.
All fixed up and good as new.
UPDATE 1/21/2013: A commenter reports that you can order free replacement parts at http://www.snapcircuits.net/support/replacement_upgrade. If you need to build that AM radio right away you could still fix things yourself, then order a replacement at the same time.
After doing some freezer paper printing* on a shirt for my son, I wanted to do some more intricate designs and maybe even sell some of them, but didn’t want to spend a lot of money buying a press. So what do I do instead? Spend a lot of money building a press! Â Click the “continue reading” link for some details on the construction of my homemade screen printing press.
*cut a stencil in some freezer paper, iron it onto a shirt, dab on ink, pull up the stencil, set the ink with an iron.
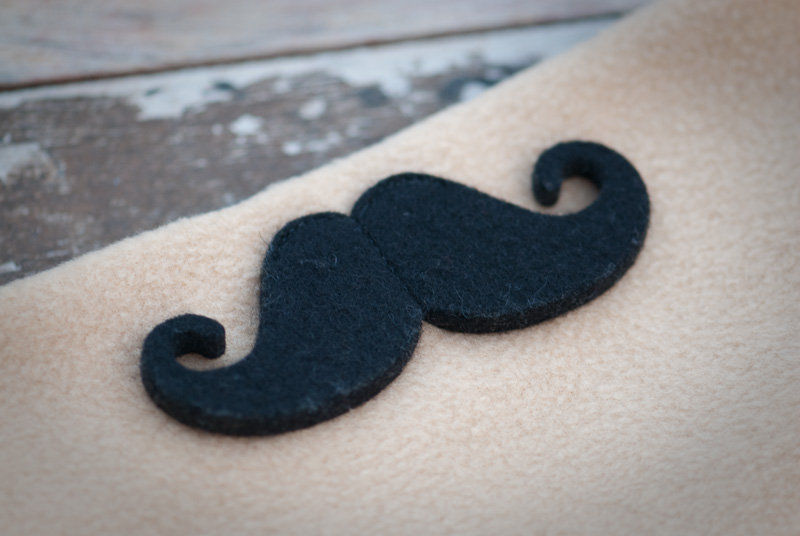
When you receive your laser cut wool (in my case, from Ponoko), the first thing you’ll likely notice is the smell.  It makes sense if you think about it — wool is a kind of hair, lasers cut by burning, therefore the perfume of burnt hair.  Mmmmmm.
Lean in close and take a deep whiff.
So what can you do about this? Â It obviously won’t do to ship to your customer (or use in your own project) as-is. Â Follow along as I clean up the most recent order of mustaches for my fleece neckwarmers. Â Your project will be different, but here’s what works for me…
For the fall of 2010 I’ve got some awesome new designs, now featuring hardcore handlebars. The neckwarmer is still the same, but you can now get mustaches in thick wool felt or leather. These are laser cut for extra futuristic awesomeness. See pictures in the gallery below, or visit my etsy shop.With the introduction of these new styles, I’ll be phasing out the most intricate of the fleece mustaches because they were such a pain in the rear to make.